Turbocharge Your Google Cloud Storage Assets with Cloud CDN (A Step-by-Step Guide & Pricing Breakdown)
If you are serving static assets images, CSS, JavaScript, or videos directly from a Google Cloud Storage (GCS) bucket, you might eventually face two challenges: latency for users located far from your bucket's region, and rising network egress bills.
The solution to both is Google's Cloud CDN (Content Delivery Network).
However, if you look at your GCS bucket's settings, you won't find an "Enable CDN" button. That's because Cloud CDN doesn't sit on the bucket; it sits in front of it, attached to a Global External Application Load Balancer (ALB).
In this guide, we will walk through the exact steps to architecture this solution and then break down exactly how the billing changes once you activate it.
Prerequisites
Part 1: The Step-by-Step Implementation Guide
Step 1: Prepare Your Bucket (The Origin)
Before setting up the CDN, your bucket needs to be accessible. For this tutorial, we will assume you are serving public assets (like website images).
Navigate to the Cloud Storage console.
Find your bucket and go to the Permissions tab.
Ensure that allUsers has the role Storage Object Viewer.
(Note: If you need to serve private content via CDN, you will need a more advanced setup involving Signed URLs, which is outside the scope of this basic guide.)
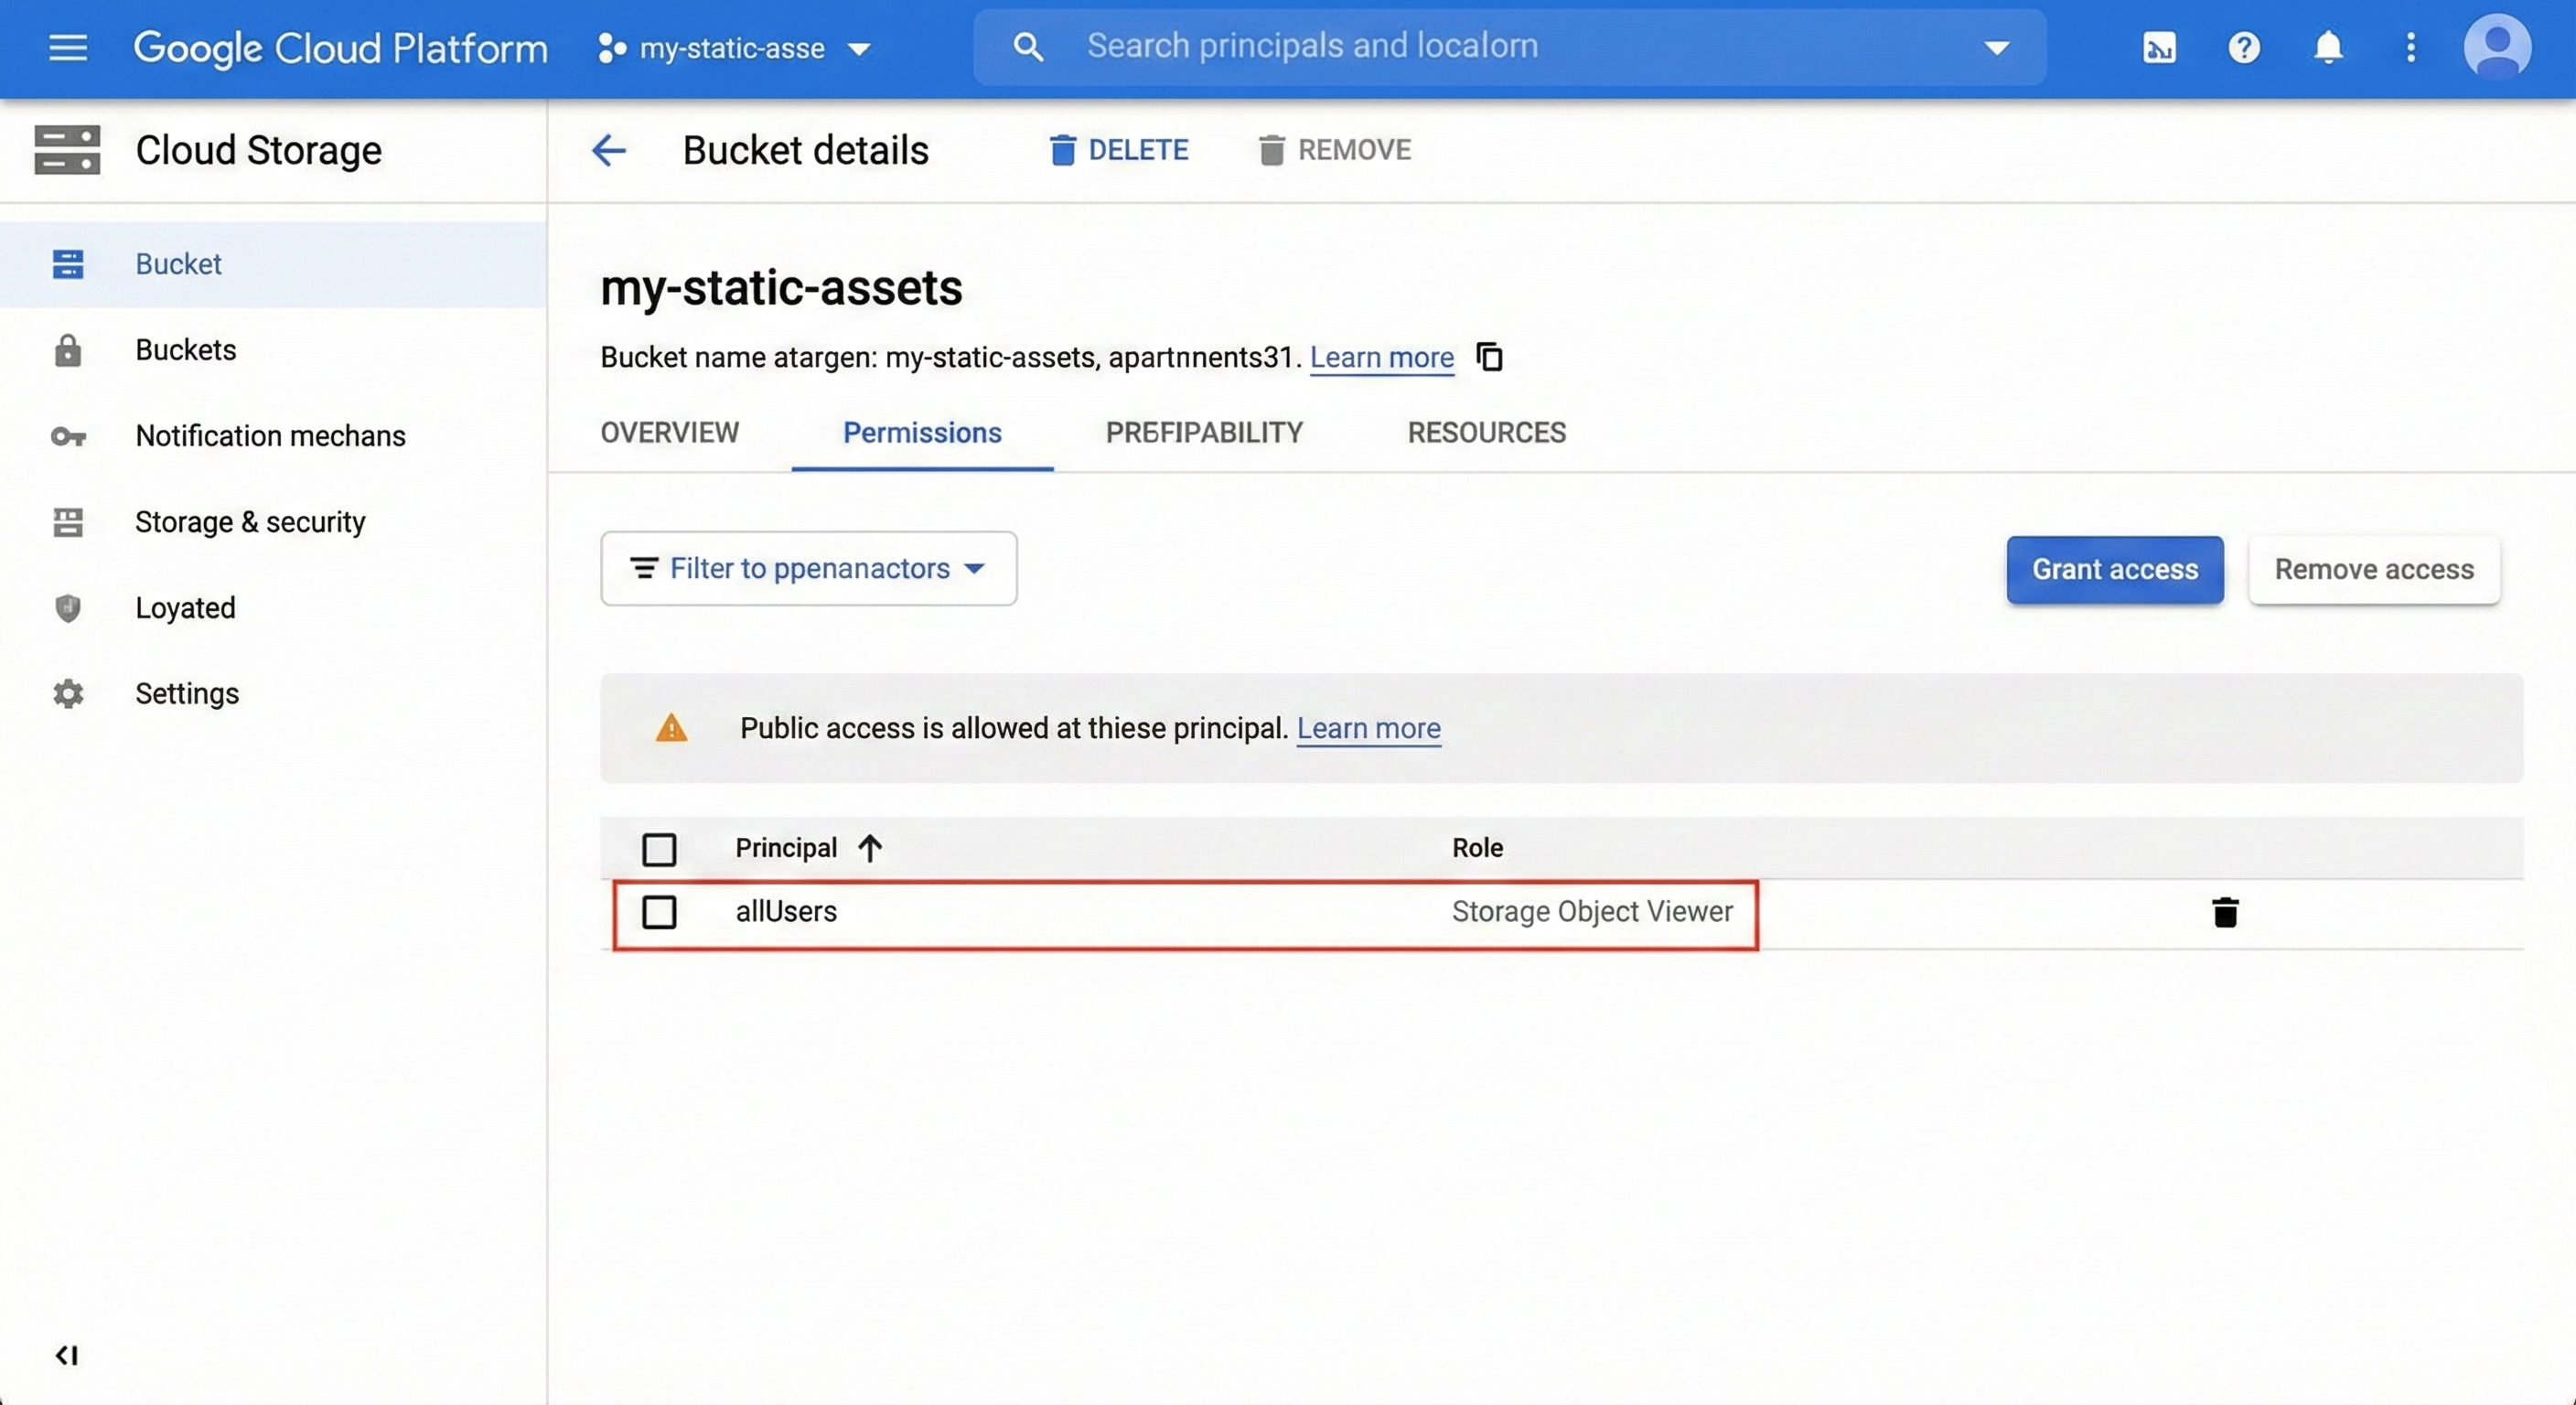
Caption: Making your bucket publicly readable so the CDN can access the files.
Step 2: Create the Load Balancer
The Load Balancer acts as the "front door" for your users.
In the GCP Console, go to Network Services > Load balancing.
Click the blue Create Load Balancer button.
Under "Application Load Balancer (HTTP/HTTPS)", click Start Configuration.
Select From Internet to my VMs or serverless services (classic).
Select Global HTTP(S) Load Balancer (classic).
Give your load balancer a name.
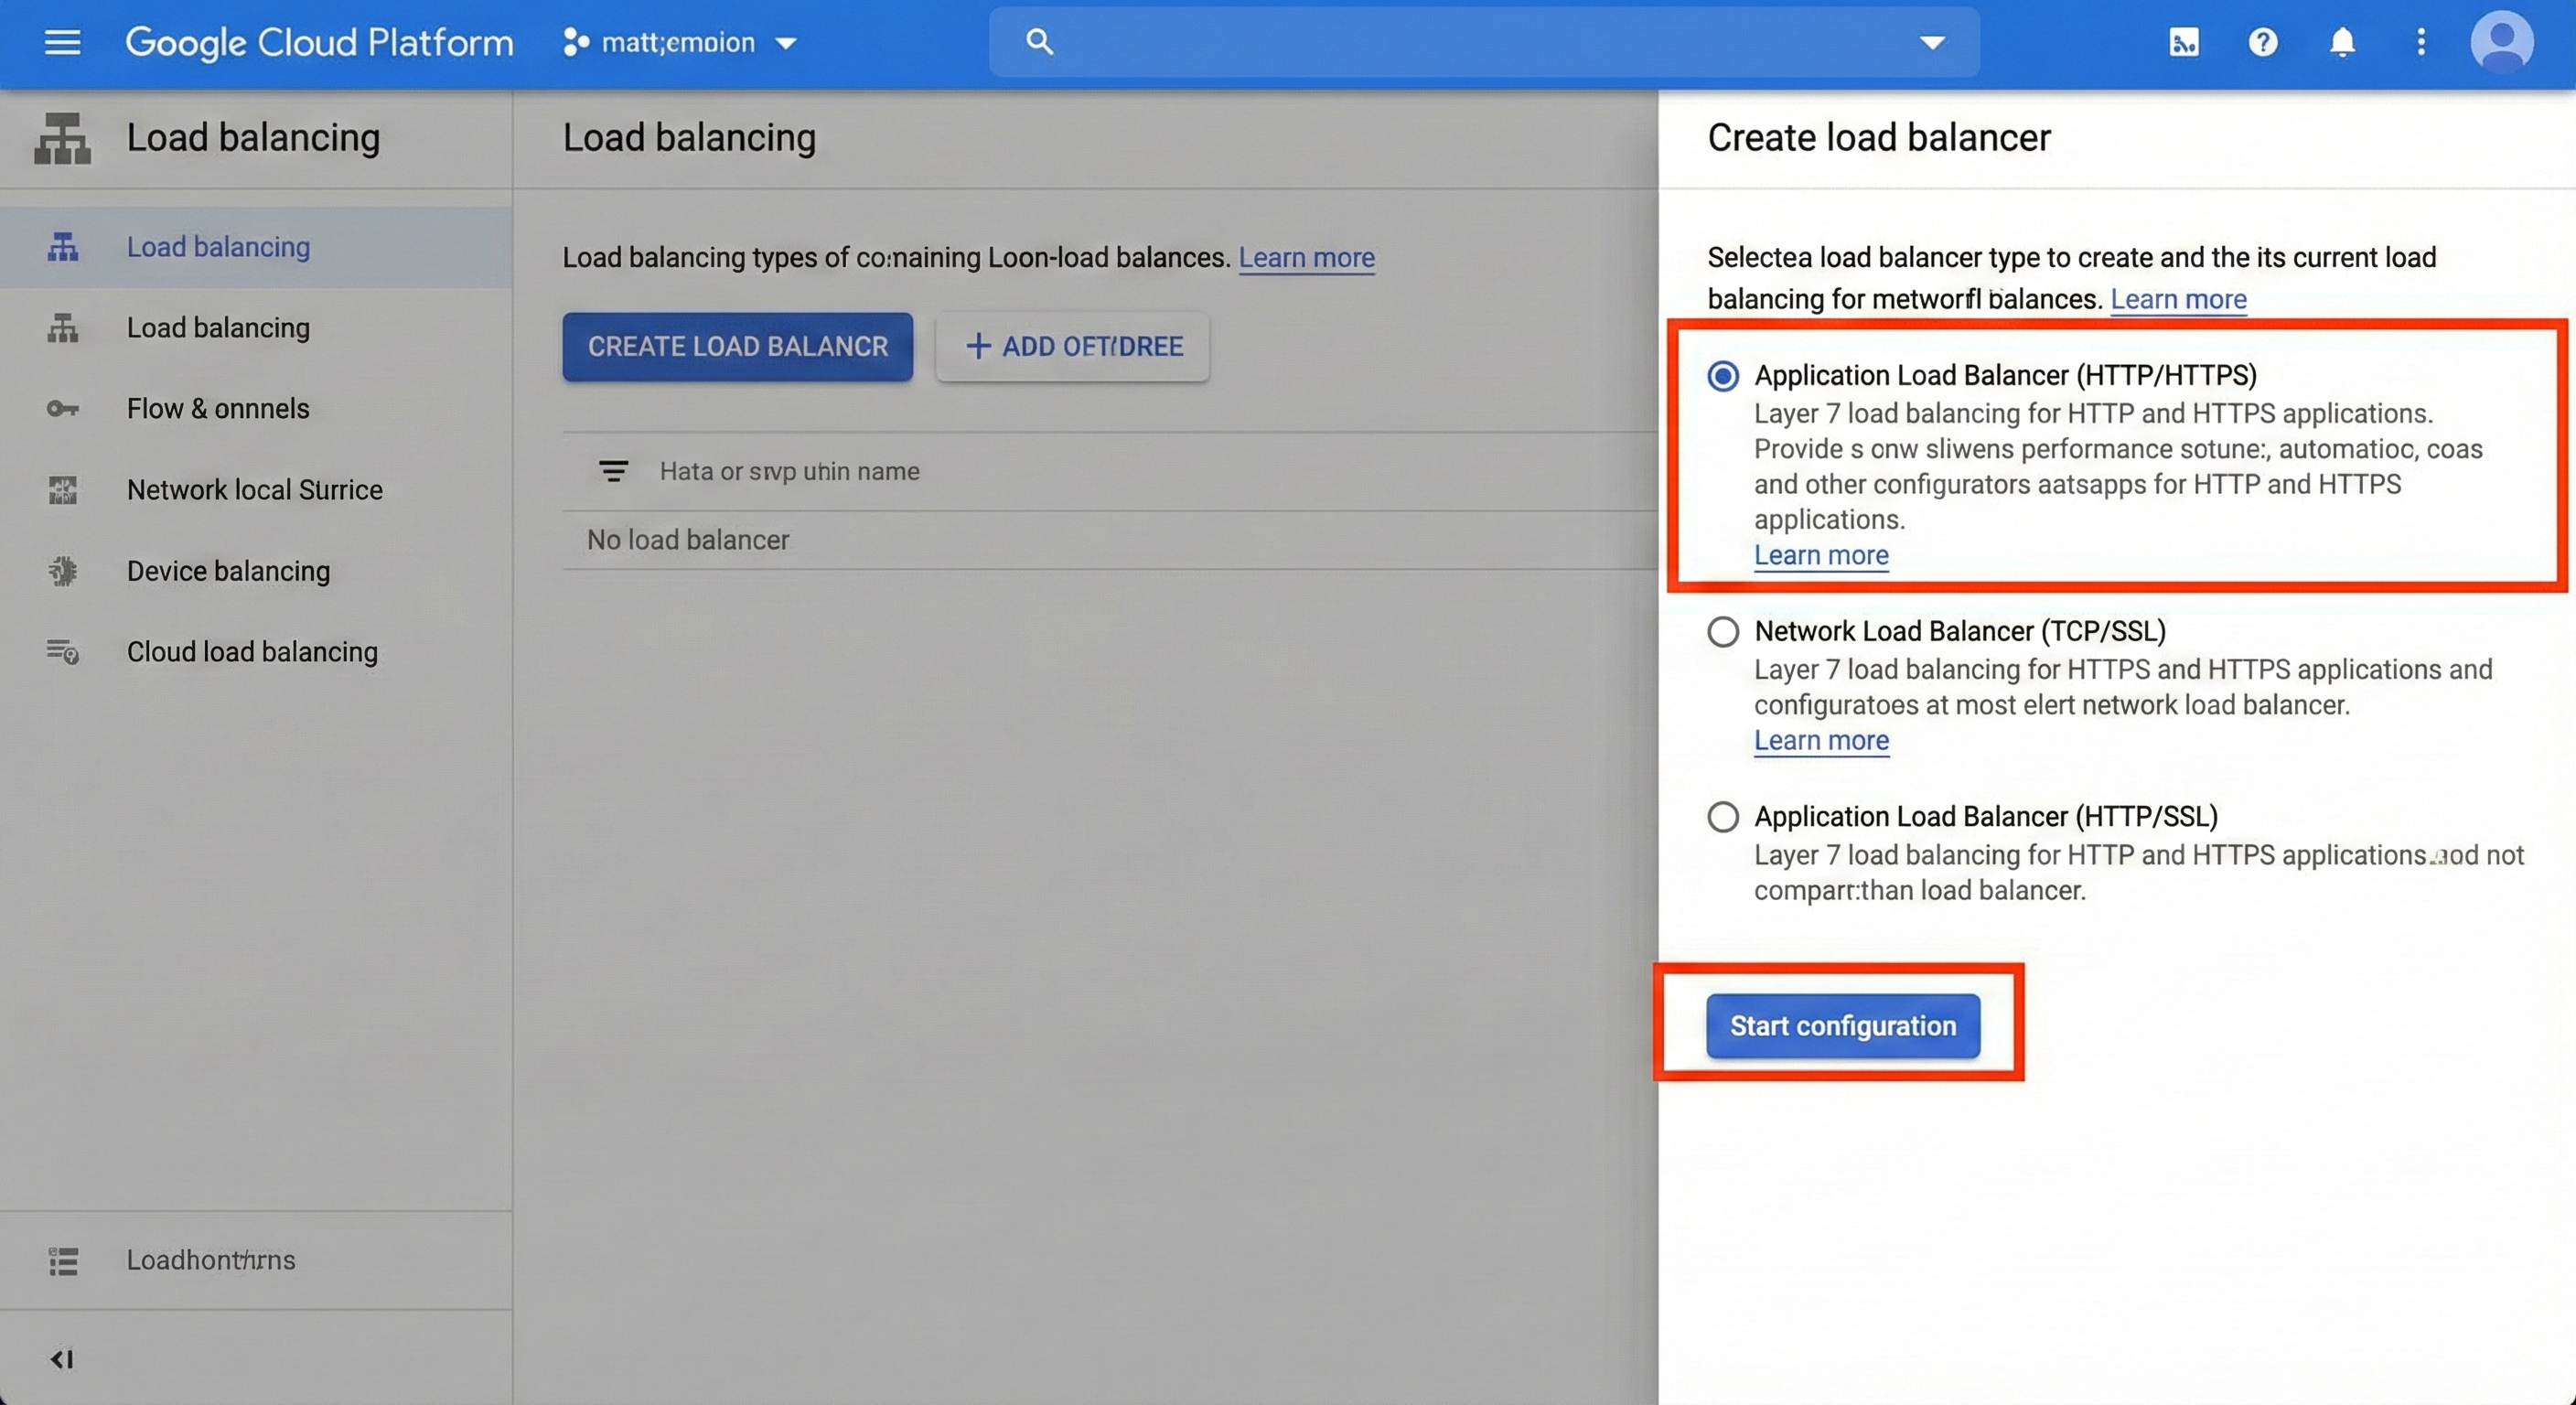
Caption: Choosing the correct type of Global Load Balancer.
Step 3: Configure the Backend (The Bridge)
This is the crucial step where we connect the Load Balancer to your bucket and turn on the CDN.
Click on Backend configuration.
In the "Backend services & backend buckets" dropdown, select Create a backend bucket.
Name: Give your backend bucket a recognizable name (e.g., static-assets-backend).
Cloud Storage Bucket: Click "Browse" and select the bucket you prepared in Step 1.
Enable Cloud CDN: ✅ Check this box. This is the magic switch.
(Optional) Cache capabilities: You can leave this on default unless you have specific caching requirements.
Click Create to finalize the backend service, then click OK in the main LB menu.
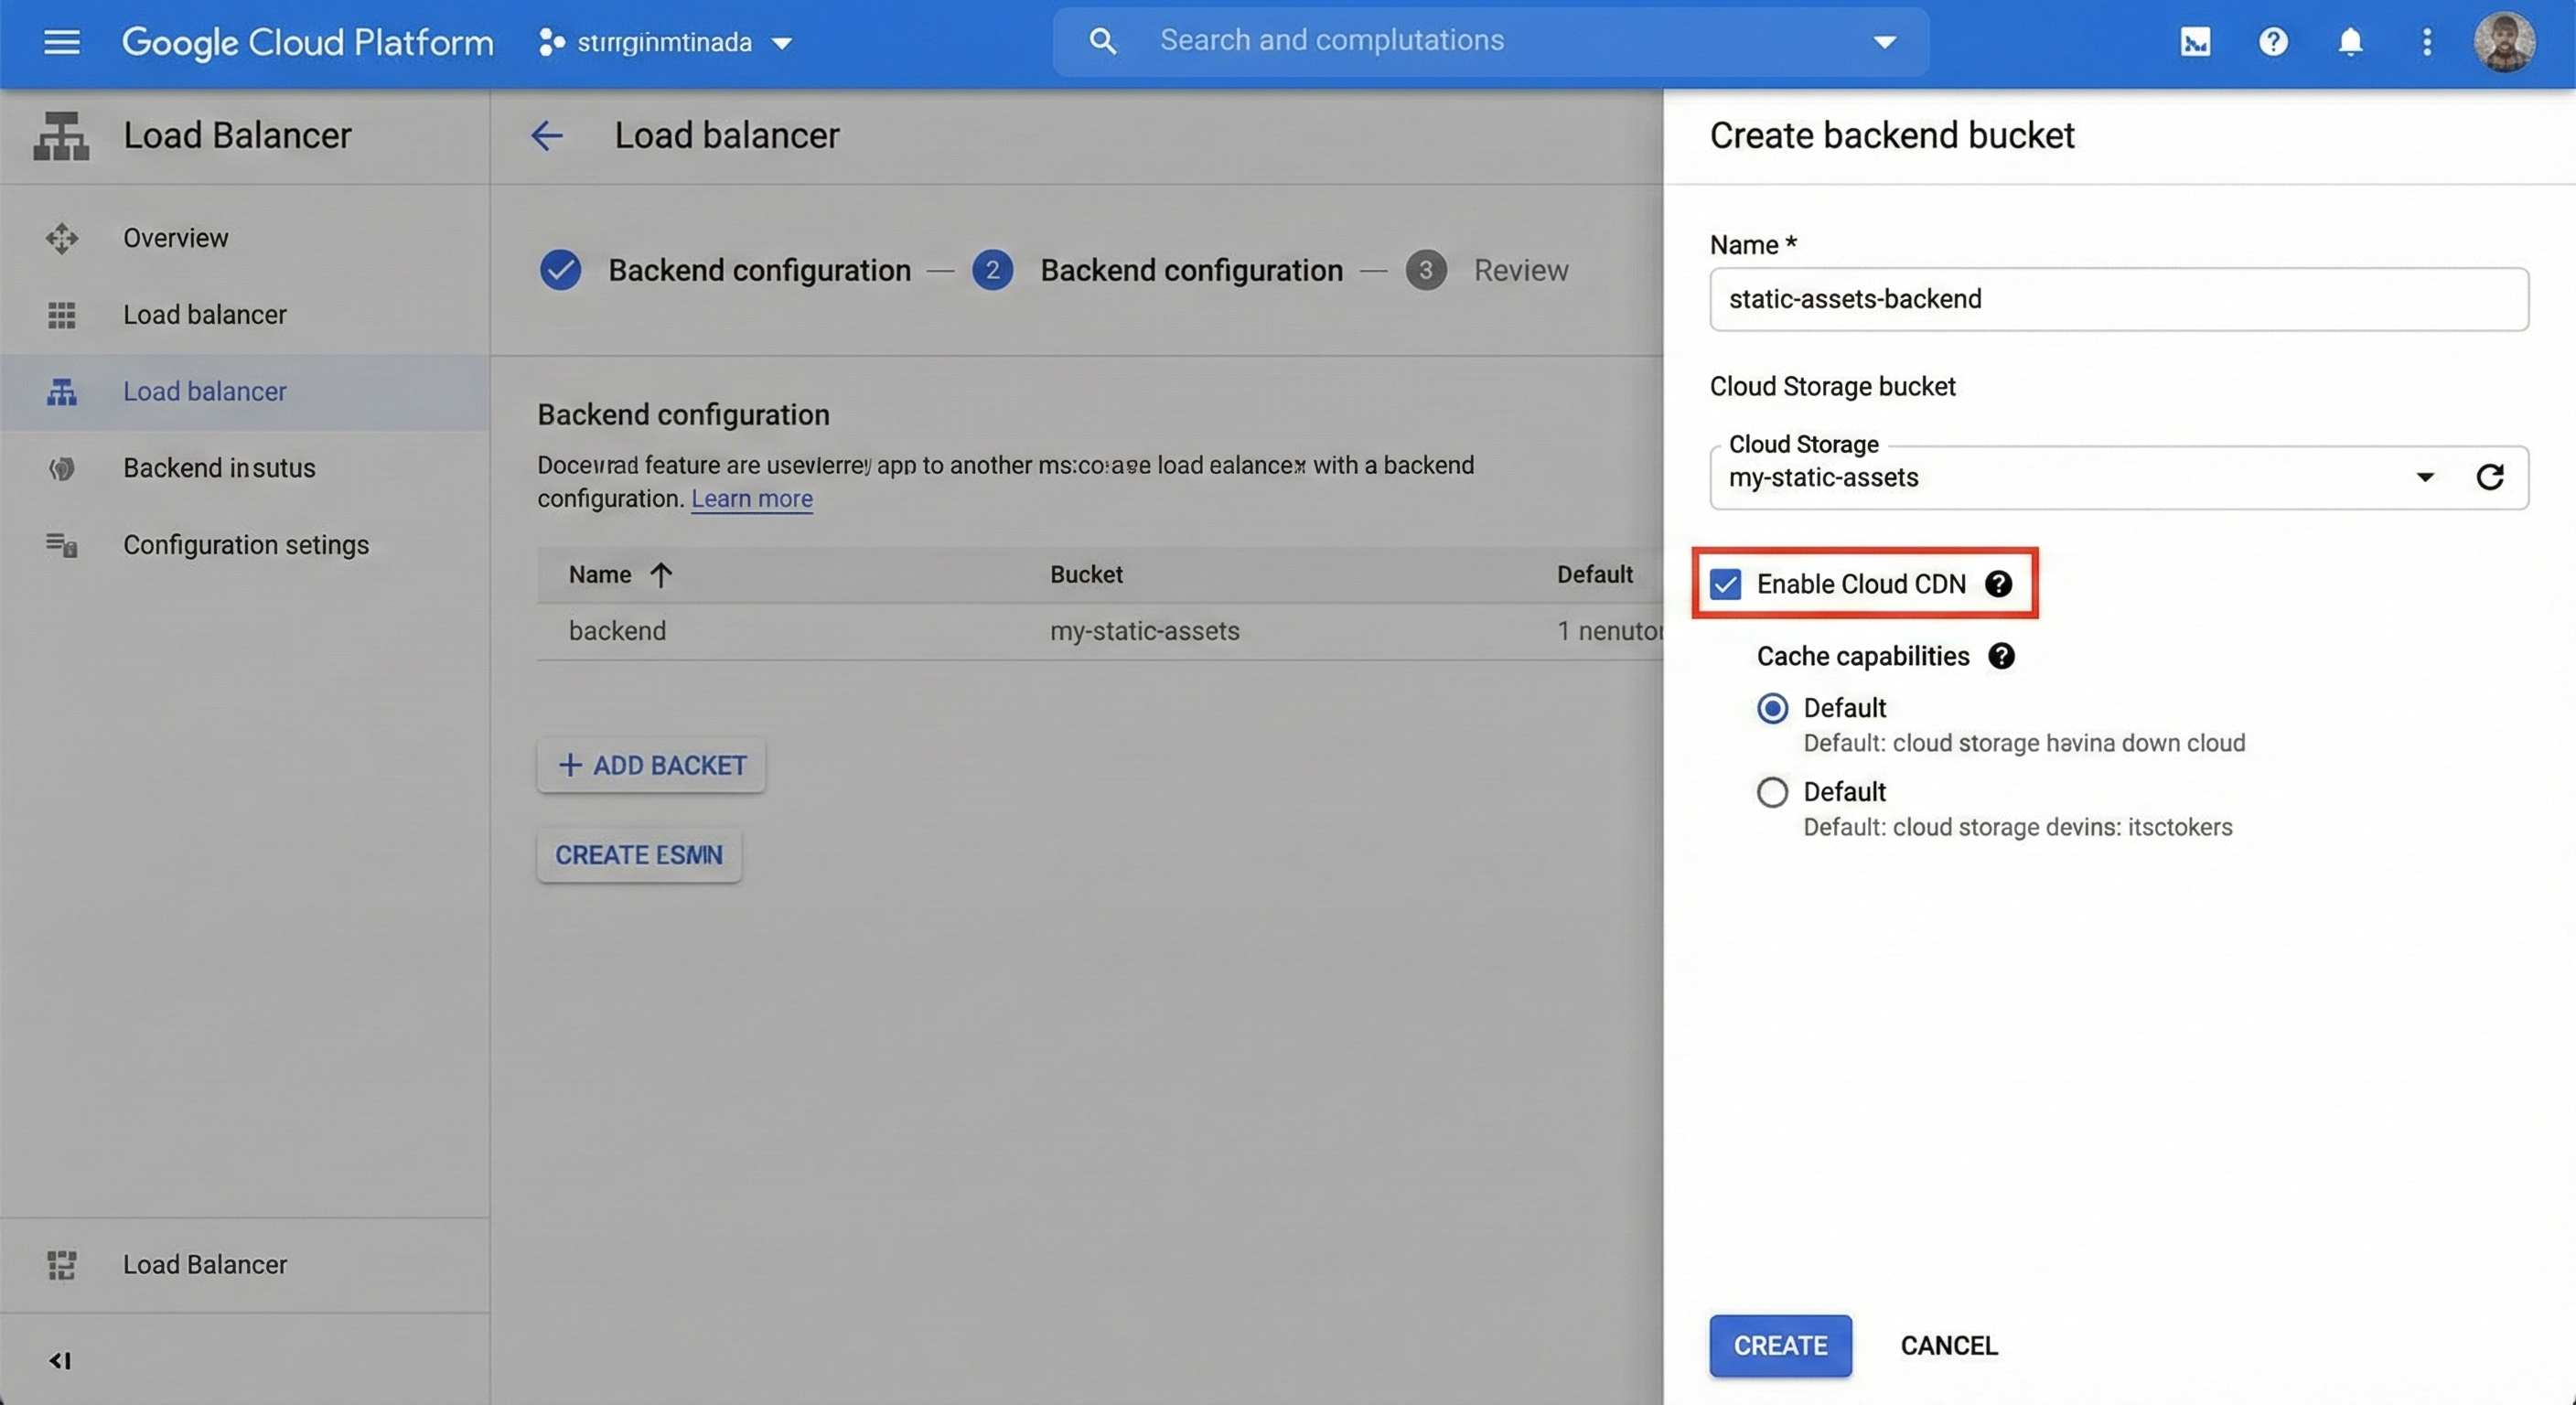
Caption: The critical step: linking your GCS bucket and enabling the CDN checkbox.
Step 4: Configure Frontend and Finalize
Finally, configure how the outside world connects to this setup.
Click on Frontend configuration.
Protocol: Choose HTTP (for testing) or HTTPS (requires an SSL certificate).
IP Address: It is highly recommended to create a new static IP address here. This ensures your DNS records won't break if the load balancer restarts.
Click Done.
Click Review and finalize to check your settings, then click the Create button.
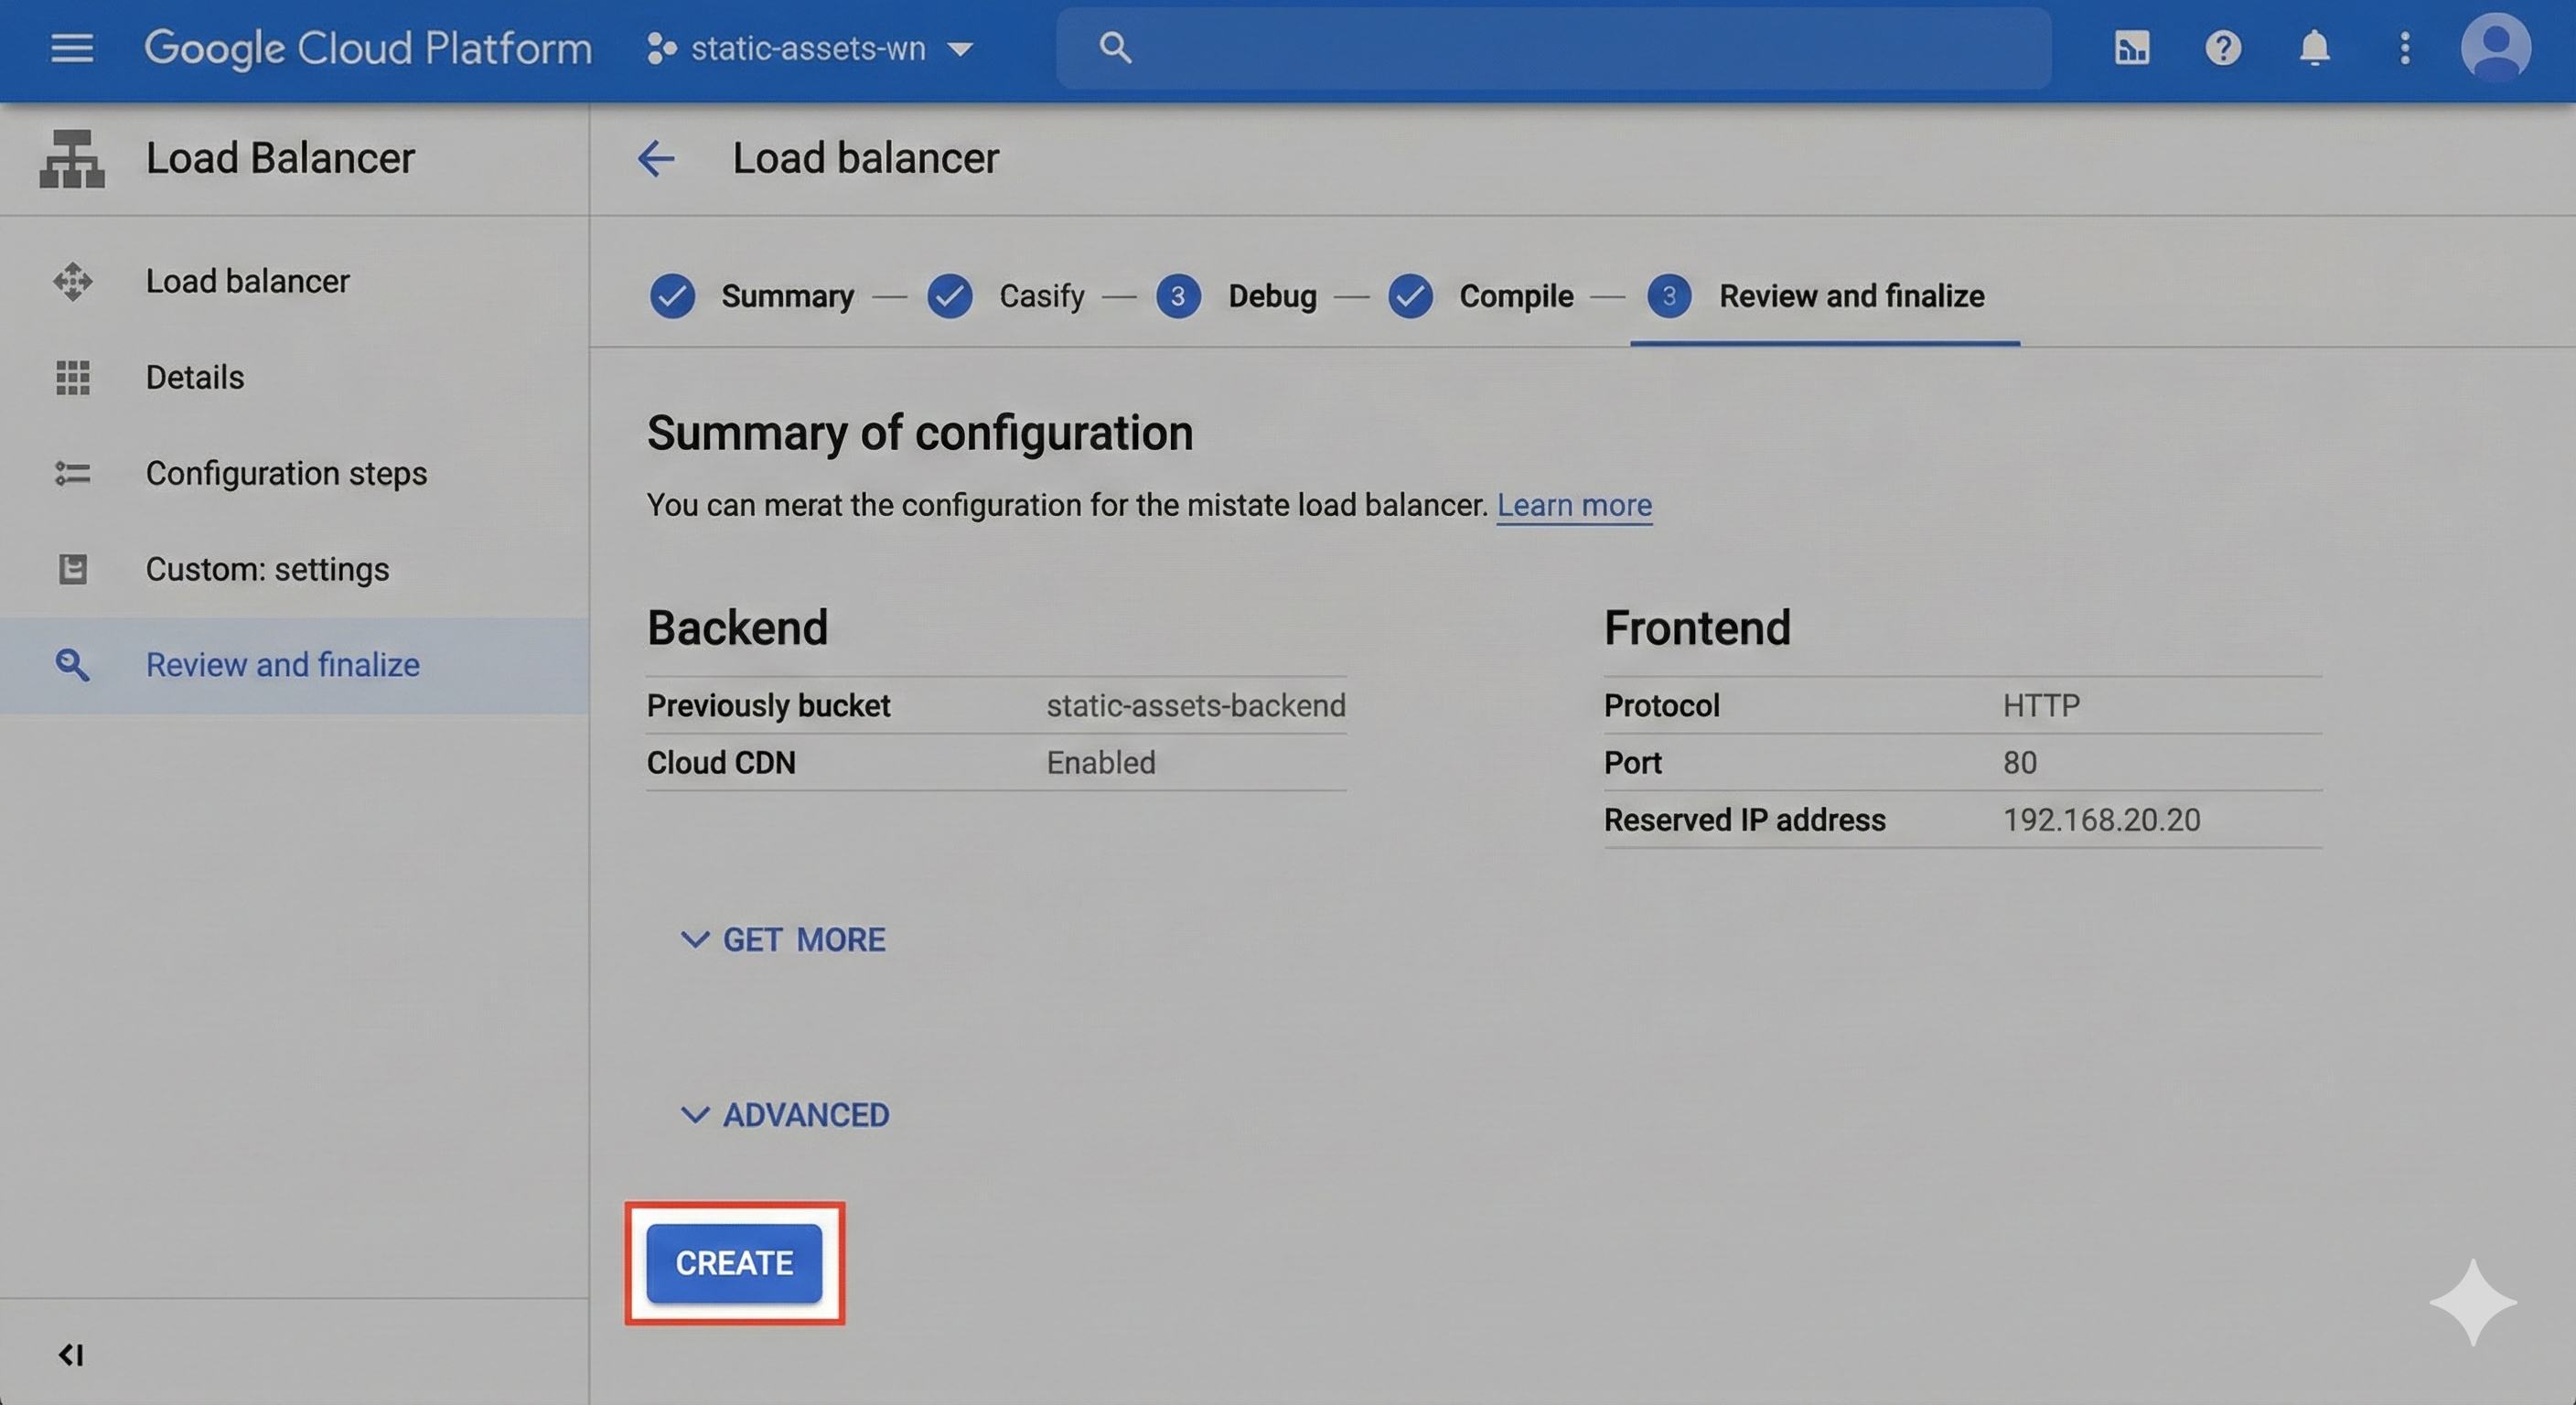
Caption: Reviewing your topology before deployment.
⚠️ Important: Provisioning a Global Load Balancer and propagating the SSL certificate can take 10–20 minutes. Grab a coffee while Google configures its global network edges.
Part 2: The Pricing & Billing Breakdown
This is where many users get confused. When you enable Cloud CDN, you change the fundamental way you are billed for delivering these files.
When serving directly from GCS, you pay high "Internet Egress" rates. When using Cloud CDN, you stop paying GCS egress and start paying CDN rates.
The Components of CDN Pricing
Your bill will shift to these three main categories:
1. The Fixed Cost (The Load Balancer)
To use Cloud CDN, you must have a Load Balancer running. This incurs a flat fee regardless of traffic.
2. The Variable Costs (Traffic & Requests)
ComponentCost EstimateExplanationCache Egress$0.02 – $0.08 / GBData sent from the CDN edge to the user. This is significantly cheaper than standard GCS Internet Egress (which is ~$0.12/GB).Cache Fill~$0.01 / GBWhen the CDN doesn't have the file cached and has to fetch it from your bucket, you pay this tiny "fill" fee instead of the standard GCS egress fee.Cache LookupsTiny ($0.0075 / 10k req)A minuscule fee for every HTTP request that hits the CDN network.3. GCS Storage Costs
You still pay the standard storage rate for the actual data sitting at rest in your GCS bucket (e.g., Standard class is ~$0.020/GB/month).
Billing Example: Direct GCS vs. Cloud CDN
Let’s visualize the difference. Imagine you have a 10MB video file that goes viral and is downloaded 10,000 times in a month (Total 100 GB of traffic).
Scenario A: Direct GCS (No CDN)
You pay the premium rate for data leaving Google's network.
Data Transfer: 100 GB * $0.12 (Standard Egress) = $12.00
GCS Operations: 10k requests * $0.004/1k = $0.04
Total: $12.04
(Performance Result: High latency for global users)
Scenario B: With Cloud CDN (Assuming 99% Cache Hit Ratio)
You pay a fixed fee, but a much lower data rate.
Load Balancer Fee: ~$18.00/month (Fixed base cost)
Cache Fill (The 1% that missed): 1 GB * $0.01/GB = $0.01
Cache Egress (To users): 100 GB * $0.08 (Avg CDN rate) = $8.00
Cache Lookups: $0.01
Total: ~$26.02
(Performance Result: Instant delivery globally)
The Verdict
As you can see in the example above, for lower traffic amounts, the CDN is actually more expensive due to the fixed Load Balancer fee.
So, when should you enable it?
If Performance is Paramount: If speed is your primary goal, the extra cost is irrelevant. The CDN is always faster for global users.
If You Have High Volume: Once your traffic exceeds roughly 200GB–300GB per month, the cheaper data rates of the CDN ($0.08 vs $0.12) will eventually offset the $18 fixed Load Balancer fee, and you will start saving money while getting better performance.